

How Small a Leak Can Helium Leak Testing Detect?
Aug. 06, 2026
helium leak testing is one of the most reliable ways to find very small leaks in sealed products, components, and assemblies. If you are asking how small a leak can helium leak testing detect, the real answer depends on the test method, the instrument sensitivity, the part geometry, the test pressure, and the stability of the test environment. In this article, we explain what users want to know, what purchasing teams worry about, and how to choose the right test approach with Zholion.
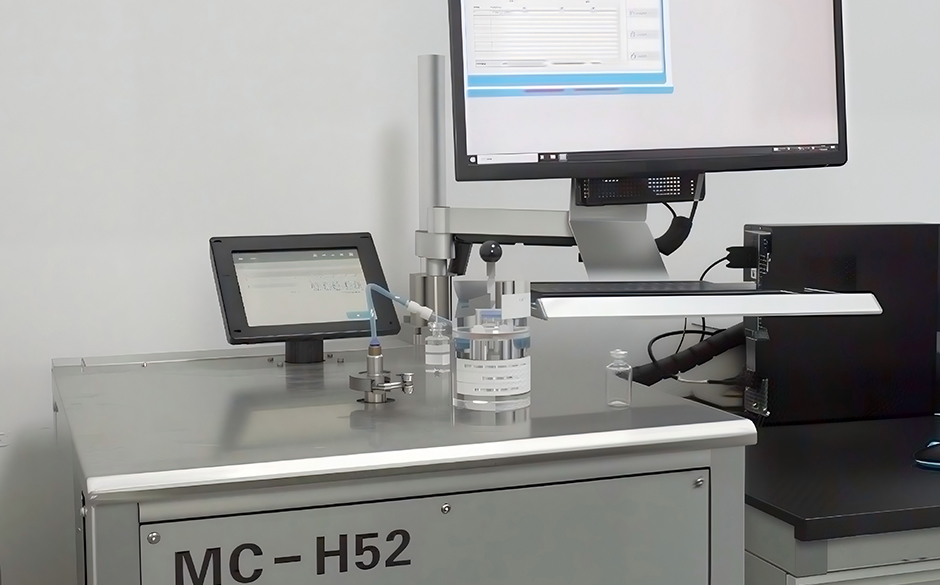
What Leak Size Can Helium Leak Testing Detect
Understand the detection limit in simple terms
Most readers want a clear number first. In practice, helium leak testing can detect extremely small leaks, often in the range of 10^-12 to 10^-9 mbar.L/s, depending on the system configuration and test mode. For many industrial applications, this means the method can identify leaks that are far smaller than what pressure decay, bubble testing, or visual inspection can find. However, the smallest detectable leak is not a fixed number. It changes with the instrument, vacuum level, background noise, and the way the part is prepared and tested.
When choosing a test target, buyers usually want to know three things:
- What is the smallest leak the equipment can detect?
- What leak rate is acceptable for my product?
- How do I prove the result is repeatable in production?
Why the answer is different for every application
Different products require different sensitivity. A sealed medical device may need much tighter limits than a general industrial enclosure. A refrigeration component may tolerate a different leak rate than a semiconductor package. The actual detectable leak depends on:
- Test method, such as vacuum chamber, sniffer, or bomb method
- Part volume and internal pressure
- Helium accumulation time
- Ambient helium background
- Instrument resolution and calibration quality
Step by step to estimate your needed detection level
- First, define the function of the part and the cost of failure.
- Second, identify the maximum acceptable leak rate for the application.
- Third, choose the helium leak testing method that matches the part shape and production volume.
- Fourth, confirm the instrument sensitivity is at least one order of magnitude better than the required limit.
- Fifth, run validation tests with known reference leaks to confirm repeatability.
What Buyers Are Really Worried About Before They Purchase
Accuracy, repeatability, and false alarms
Purchasing groups do not only ask about the smallest leak size. They also worry about whether the machine will produce reliable results every day. If an instrument is too sensitive to noise, it may create false rejects. If it is not sensitive enough, it may miss critical defects. Buyers want a balance between detection capability and production stability.
Total cost of ownership
Many teams compare price, but the real concern is total ownership cost. This includes maintenance, calibration, operator training, spare parts, helium consumption, and downtime. A lower-cost machine can become expensive if it causes frequent interruptions or requires complex support.
Compatibility with the part and production line
Users often search for guidance because they need to know whether a leak tester fits their actual part. Important questions include:
- Can it test small or large parts?
- Can it work with soft seals, welded parts, or molded housings?
- Can it be integrated into a semi-automatic or fully automatic line?
Step by step to reduce purchasing risk
- First, collect the product drawing and the required leak specification.
- Second, ask the supplier for a sensitivity demonstration using a certified reference leak.
- Third, compare test speed, pass fail logic, and software traceability.
- Fourth, confirm installation requirements such as power, gas supply, and compressed air.
- Fifth, review service support, calibration schedule, and warranty terms.
Which Helium Leak Testing Method Should You Use
Vacuum chamber testing for highest sensitivity
Vacuum chamber testing is often chosen when the goal is maximum detection capability. The part is placed inside a chamber, helium is used as tracer gas, and the instrument measures how much helium escapes. This method is excellent for small leaks and high-value products. It is one of the most common answers to the question how small a leak can helium leak testing detect, because it often reaches the highest sensitivity.
Sniffer testing for larger parts or installed systems
Sniffer testing is useful when the part is too large to fit inside a chamber or when the test must be performed on an installed system. A probe is moved across suspected leak areas while helium is applied to the opposite side. This method is practical and flexible, but the sensitivity is usually lower than a vacuum chamber method.
Bombing method for sealed components
The bombing method is used for sealed devices that can absorb helium under pressure and later release it during measurement. It is widely used in some electronic and hermetic packaging applications. The process is more specialized and requires careful time control.
Step by step to select the right method
- First, define whether the part is sealed, open, large, or installed in a system.
- Second, identify whether the leak must be measured in production or in laboratory validation.
- Third, compare the sensitivity needed against the speed required on the line.
- Fourth, choose vacuum chamber, sniffer, or bombing based on part structure.
- Fifth, verify the method using a sample part and a known leak standard.
What Tools and Materials Are Required for Reliable Testing
Core equipment checklist
To perform helium leak testing correctly, users usually need more than just the detector. A complete setup may include:
- Helium leak detector
- Vacuum pump
- Test chamber or sniffer probe
- Reference leak standard
- Helium gas supply
- Fixtures and seals for the part
- Calibration tools and software
Support tools for production environments
On a production floor, operators often need additional items to make the process stable and repeatable:
- Pressure regulator
- Compressed air supply
- Data logging system
- Barcode or serial number traceability system
- Cleaning tools for the test interface
Step by step to prepare the tools before testing
- First, inspect the detector and confirm the calibration status.
- Second, verify the reference leak standard is valid and undamaged.
- Third, check all hoses, seals, and fittings for wear.
- Fourth, make sure the test part is clean and dry.
- Fifth, confirm the helium supply and vacuum system are stable before starting.
How to Perform Helium Leak Testing Step by Step
First step: prepare the part
Clean the component thoroughly before testing. Oil, dust, moisture, or residue can interfere with the seal and produce misleading results. Make sure the part is assembled exactly as it will be in real use.
Second step: choose the correct test fixture
Use a fixture that holds the part without deforming it. A poor fixture can create artificial leaks or mask real ones. The sealing interface should be consistent from part to part.
Third step: connect the helium leak testing system
Attach the detector, vacuum system, or sniffer probe according to the chosen method. Check that all connections are tight and that no external leaks are introduced into the test setup.
Fourth step: run the test
Apply helium according to the procedure. Allow enough time for the tracer gas to reach the leak path. Then measure the response and compare it with the acceptance limit.
Fifth step: judge pass or fail
Record the leak rate and compare it with the target specification. A part passes if it stays below the maximum allowable leak rate. If the reading exceeds the limit, mark the part for rework, repair, or rejection based on the quality plan.
Sixth step: document and verify results
Keep records for traceability, especially in regulated industries. Document the test date, operator, part number, leak rate, and calibration status. This helps quality teams audit the process later.
Common mistakes to avoid
- Skipping calibration before testing
- Using damaged seals or worn fixtures
- Testing dirty or wet parts
- Choosing a method that is too sensitive or not sensitive enough
- Ignoring ambient helium background in the test area
- Failing to confirm the acceptance criteria before production
How to Interpret Leak Rate Results Correctly
Do not confuse leak size with leak rate only
Users often ask how small a leak can helium leak testing detect, but the reading is usually expressed as leak rate, not only hole size. A tiny hole may create a different leak rate depending on pressure difference and gas properties. This means a leak rate limit must be tied to the product requirement, not just to a generic number.
Use reference leaks to confirm scale
A reference leak standard helps verify that the system can accurately measure the target range. This is especially important when a customer needs proof that the equipment can detect very small leaks consistently.
Step by step to read results correctly
- First, confirm the unit of measurement used by the instrument.
- Second, compare the reading to the product limit, not to a general industry estimate.
- Third, check whether the test was affected by environmental noise or setup errors.
- Fourth, repeat the measurement if the result is near the threshold.
- Fifth, use a reference leak if the reading must be validated for quality release.
How to Choose a Supplier and Avoid Buying the Wrong System
Ask for proof, not only specifications
Marketing claims are not enough. A good supplier should demonstrate helium leak testing performance on real parts or equivalent samples. Ask for sensitivity data, repeatability data, and service support information.
Check automation and integration options
If the equipment will be used in production, the system should support your line speed and data requirements. Look for simple integration with PLC, MES, barcode traceability, and quality reporting systems.
Step by step to evaluate suppliers
- First, request the technical specification and application case studies.
- Second, compare sensitivity, cycle time, and automation level.
- Third, ask for training, installation, and calibration support details.
- Fourth, test the equipment on your actual sample if possible.
- Fifth, review long-term service, spare parts, and upgrade options.
Why Helium Leak Testing Remains the Best Choice for Small Leaks
High sensitivity and strong reliability
Among industrial leak detection methods, helium leak testing remains one of the most precise options for finding tiny leaks. It is widely used because it combines strong sensitivity with repeatable measurement and clear pass fail decisions.
Suitable for quality-critical industries
Industries that depend on leak-free products often choose this method for a reason. It is commonly used in automotive, aerospace, refrigeration, medical devices, power electronics, and vacuum systems because the consequences of leakage can be severe.
Step by step to build a long-term testing strategy
- First, define the leak limit for each product family.
- Second, standardize the test method and fixtures.
- Third, train operators on setup, execution, and result interpretation.
- Fourth, maintain calibration and reference leak verification.
- Fifth, review production data regularly to improve process stability.
In summary, helium leak testing can detect extremely small leaks, but the exact limit depends on the method, the instrument, and the application. If your goal is to understand how small a leak can helium leak testing detect, the best approach is to define the required leak rate, select the proper test method, and validate the setup with reference standards. Zholion provides practical solutions that help buyers and engineers choose the right system with confidence, from sensitivity verification to production integration. If you are planning a new leak detection project, start with the part requirement, then match the test method, and finally confirm the result with repeatable helium leak testing.
Related News
-
Vial Integrity Testing vs. CCIT: What's the Difference?
Sep. 28, 2026
-
Vacuum Decay Leak Testing vs. Helium Leak Testing
Sep. 25, 2026
-
How to Test Lyophilized Vial Seal Integrity
Sep. 25, 2026
-
When Should You Add Headspace Analysis to a Pharmaceutical CCIT Program?
Sep. 24, 2026
Related Products


